SHARING EXPERIENCE
I am thrilled to present to you the USD pipeline that we have developed in collaboration with Matéo MARIE.This pipeline has been successfully used in our graduation films at ESMA, titled "Spurs Out" and "Ratzia". In order to share our knowledge and experiences, we have created detailed documents outlining this pipeline, along with templates and scripts that will give you a better understanding of our work. We are excited to share these resources with you and engage in discussions about our experience.
ABSTRACT
This document outlines the research and implementation process of a USD pipeline for the creation of a 3D animated short film. The pipeline is centered around SideFX's SOLARIS, the dispatcher Tractor, and the rendering engine Renderman, while also integrating other software such as Maya and Substance Painter.
Additionally, we delve into the functionality of Python scripts that we have developed to streamline our workflows.


I: INTRODUCTION
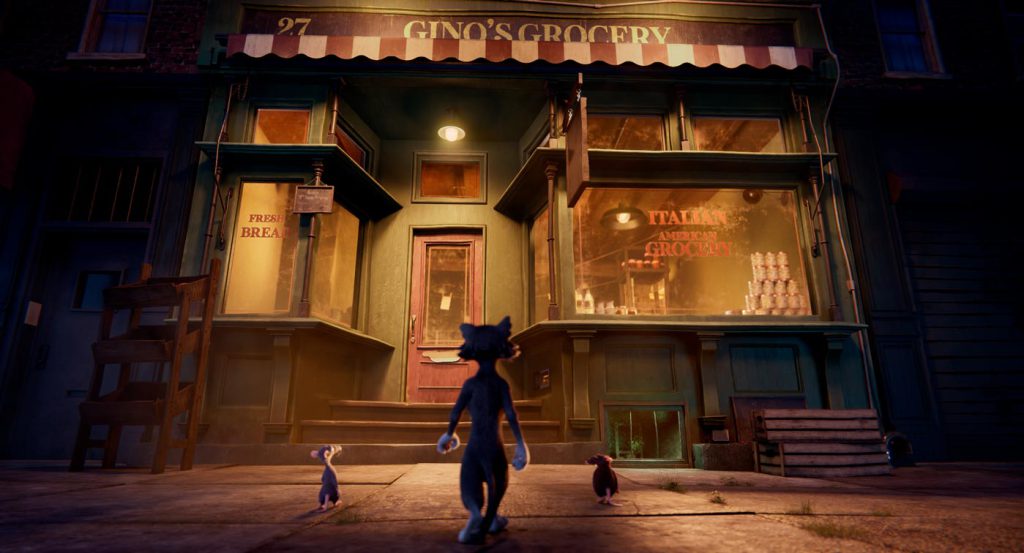
We are pleased to present the USD pipeline that we, Raphaël GIMARD and Matéo MARIE, have established for our graduation shorts at ESMA, titled 'Spurs Out' and 'Ratzia,' with the assistance of Philippe LUNEAU and Yann PANNETIER, whom we would like to thank.
This document provides us an opportunity to share our experience and approach in using the format known as USD (Universal Scene Description) to assist other artists and 3D technicians in their projects. Our goal is to highlight the advantages and possibilities that USD offers in the process of creating animation movies.
By developing our own USD pipeline tailored to the specific needs of our films and team, we have gained valuable technical skills. We firmly believe that sharing our experience can generate interest among industry professionals and encourage them to explore the potential of using USD in their own projects.
Without further ado, let's delve into the details of our USD pipeline, focusing on the customized features we have developed and the benefits they have brought to our work. We hope that this presentation will be helpful and enriching in your own artistic journey.
II: OUR USD PIPELINE
We chose Maya for modeling, UVs, and rigging as it is the software we are most familiar with. Afterwards, we exported our models in USD format.
For look development and set dressing, we opted for SideFX’s Solaris, which allowed us to easily create and adjust materials and set designs. The sets were exported as USD files : this facilitates collaborative work with the animators, who could import the sets back in Maya when needed, allowing them to make any necessary set adjustments. Modifications made to the sets could be retrieved using the USD sublayers system.
The final animations were exported as Alembic files and imported into Solaris for lighting and rendering of the shots.
This combination of Maya, Solaris, and USD allowed us to take full advantage of the benefits of each tool throughout our pipeline. In the following sections, we will further detail each stage of our USD pipeline and the customized features we have implemented.
(Maya 2023, Houdini 19.0, Renderman 24.4, Dispatcher Tractor 2.4)
1: Modeling and UVs Layout
In Maya, we perform the modeling and UV layout of the assets before exporting them in USD format. To better understand the way USD works, we chose to export our files in ASCII, using the .usda file extension, allowing us to visualize and manipulate the content of a file in a text editor. This helped to familiarize us with the structure of the format, and to explore the various properties and hierarchies of objects. Note : ASCII files are readable with a text editor but can be heavy. Therefore, if you don’t need to read or modify a file, binary format is often more convenient as it is lighter.
During the export process, we ensure that the 'Output' option is set to 'USD File Format' in ASCII mode. Additionally, we immediately set the subdivision method to 'Catmull-Clark' and uncheck the 'USD Preview Surface' option (the latter is not necessary from Maya as it is currently only a Lambert material).
Here we encountered a problem, as Maya could not write USD files directly on our server. Therefore, we had to first export the file to our local machines and then copy it to the right project folder on the server.

2: LookDev
For LookDev, we developed two templates in Solaris:
- The first template is designed for 'standard' LookDevs and allows us to create shaders and assign them to models.
- The second template is based on a 'Component' approach, which enables us to easily add texture and/or geometry variations. This template proved particularly useful during set dressing, as we could use the Solaris 'layout' node to quickly and efficiently place numerous objects.
In the 'Standard' LookDev template, we first need to perform a “set project”, because some parameters depend on the content of the $JOB variable. Next, we scale down the object by 100 to convert from the scale used in Maya (1 unit = 1 cm) to the scale used in Houdini (1 unit = 1 m).
We then create our shaders in the 'Material Library' node and assign them to our object using the 'Assign Material' node. Finally, we export the object in USD format, which will be used later during set dressing. The rest of the template involves importing the LookDev scene to obtain appropriate lighting, rotating the object, and repositioning it if necessary.

For the Components LookDev template, the principle is similar, but with one main difference: this template is designed to create components, which are optimized elements that can be duplicated with shape and texture variations, such as fruits, furniture, or other bunches of objects.
We start by entering the 'Component Geometry' node where we import our object. We also take the time at this step to create a proxy, a simplified version of the object with a lighter mesh that will be used for display purposes. Later, during the set dressing phase, we can choose to visualize our objects in high resolution, in proxy mode to save resources, or even hide them completely. Then, in the 'Material Library' node, we create all our shaders, including the variations (one shader per variant). To assign our shaders, we use a 'Component Material' node, which functions like an 'Assign Material' node, but each 'Component Material' node corresponds to a material variant. For example, if our object needs a green variant and a red variant, we would have two 'Component Material' nodes.
All that's left to do is to export our objects using the 'Component Output' node, and we take the opportunity here to add our props to our 'Layout Asset Gallery'. This node creates a folder ('Location') where it exports our objects as separate files (geometry, materials, payload) along with a linking file ('File Name'). Once we have exported everything properly, we use the 'Add To Asset Gallery' function to find our objects in the Asset Gallery, represented by rendered icons. It is important to note that the 'Layout Asset Gallery' does not store the objects themselves but only the paths to the corresponding USD files.
For our project, we did not use geometry variants, only material variants. However, we still have shape variations for our geometries, which we exported individually. Each shape variation was exported as a separate object, each with its own texture variants. This approach significantly increased the number of objects in our asset gallery. However, it allowed us to use Physics while set dressing, so we could use collisions and stack our props on top of each other without risking them floating or intersecting each other (for example, two stacked objects that might float or penetrate each other if we modify the geometry variant of the prop below).

3: Set Dressing
The most complex part of Set Dressing lies in understanding the hierarchy and dividing your set into multiple subgroups in a rational way. For example, you may define “the kitchen” as the parent, while “the table” and “the chairs” would be its children. “The plates” and “the forks” would be children of “the table”.
There are no specific guidelines to give in this step because it mainly involves organizing the set based on its own structure and your specific needs. It is important to layout the structure of your set and think about how the different elements fit together to create a clear and logical hierarchy.
4: Rigging and Animation
Rigging and animation are done in Maya. To allow animators to work with the correct set dressing, we provide them with the exported set in USD format. From Houdini, it is simply a matter of scaling the set x100, to convert it from the Houdini scale to the Maya scale, and exporting it using the 'USD ROP' node. It is preferable to export the set in .usd format rather than .usda format to save disk space and loading time, as these file aren’t usually edited.
To import the USD set into a Maya scene, go to the "Create" menu -> "Universal Scene Description (USD)" -> "Stage From File" and import the USD file of the set. To display the USD objects in the Outliner, select "Display" -> "Shapes".
If animators need to adjust the position of accessories placed during the set dressing, they can create a USD layer that will record only the modifications. These modifications can then be used in the lighting stage.
Here is the process to follow:
Open the set from the server.
In the USD Layer Editor window, disable the "Auto-Hide Session Layer" option.
Right-click on "Session Layer" and select "Add Sublayer".
Activate the newly created “Anonymous Layer” and move the elements as desired.
Once done, double-click on the Anonymous Layer, give it a descriptive name to indicate the specific modifications for a shot, and save it (In our case, we needed to save it on our computer first, as Maya cannot directly write USD files on the server).
During the first scene save, also save the USD files. After that, only save the Maya file, nothing else.
If you want to make further modifications, make sure to select the sub-layer that you saved on your computer and click on the USD modifications save icon (You may need to reload your USD layer of modifications when opening a new Maya session, so instead of choosing "Add Sublayer" on the Session Layer, choose "Load").
As we had to save these USD files on our computers, animators had to remember to share the files if another animator continued the shot.
We will retrieve this sub-layer when setting-up the shot files, in order to recover the transformations.
Since Solaris and USD handle Alembics very well, and USD in Maya is not yet perfect, we export all animated elements in .abc format. We created scripts to export the characters. The scripts only select the necessary meshes and handle all the Alembic export settings, so you just need to specify the frame range and click on EXPORT).
5: Groom and Cloth
In our pipeline, we used Houdini for the grooming. Throughout the grooming process, there is nothing specific to USD until the export step. To export our groom caches, we saved them as sequences of .usd files. This generates a large number of files, but in the context of distributed rendering, it avoids having a single large file that takes a long time to load.
We exported all the other simulations using the same method.
6: Lighting
For the lighting stage, we have implemented a template with automations to streamline the process. These automations allow quick import of all the alembic files provided by the animators, as well as shot-specific clothing and grooming simulations. This saves time and prevents errors during import. Once this step is complete, we can light our shot, and prepare our render layers using the take list. The main render layers are already defined in our templates (e.g., BG, MG, FG, and one for each character), making it easier to export to the batch render scene.

After finalizing the lighting and render layer setup, we remove the grooming caches (which we will reapply later) and export a USD file per render layer using the "flatten stage" function. This means that these files contain all the necessary rendering information and no longer need to reference other files. This approach helps resolve an issue we encountered on the render farm, where each image would get stuck at 98% and remain pending until manually restarted.

7: Batch
Finally, for the batch template, the principle is the same as the lighting template. The 'Charger_TOUT' node allows us to quickly set up the majority of the scene by searching for all the files corresponding to the given shot. This is where we permanently retrieve the grooming caches. They are already set up, and we simply need to drag the node 'Graftt Stage' for each groom to where we need them (usually on the character's render layer, but sometimes on other render layers for shadows or reflections, to avoid a character having bald shadows, for example). Now, all we need to do is set the appropriate camera, and then we can send it for batch rendering on the farm using the utility! (We will discuss the render farm and this utility in an upcoming chapter).

Note that we have integrated Python scripts into our Hdprman nodes. Although these scripts are not essential, in our case, they were used to eliminate "ghost" husks that remained when our batches were stuck at 98%. When this occurred, we had to manually perform a "resume" operation on each job, which would only relaunch the next frame without removing the ghost husk that was still consuming 8% of the CPU. Therefore, the script helps prevent the accumulation of these ghost husks and avoids excessive CPU usage

III: DEVELOPEMENT / TRACTOR
1: Solaris Batch Utility
Rendering with Tractor posed many challenges for us. It was certainly the most technical and complex part of setting up our pipeline, but also the most crucial. We work with Renderman on Houdini version 19.0.589, and this version does not allow us to directly send our batch requests to the Renderman Tractor 2.4 dispatcher. We only had a somewhat clumsy, inefficient method of manually sending requests one image at a time. Therefore, we had to develop an automated tool.
This tool translates our Houdini scene, identifies the rendering nodes, and generates and sends "hbatch" commands to the servers. It is optimized by creating sub-scenes to avoid any conflicts in writing or reading between different machines.
Initially, our tool sent "husk" commands referencing the scene in .usd format. However, we realized that it was not the best solution as we couldn't efficiently launch image ranges. So, we opted for "hbatch" commands launched from a dedicated Houdini scene where the USD files are referenced. These "hbatch" commands generate a new "husk" command at the end of each image. This greatly simplifies a significant step in the rendering process, which is highly advantageous.
To install the utility, you need to run the "Install_env_02.bat" file. This script installs all the necessary resources for the utility to function properly. Without this, the utility will not work.
We use the Python package manager called pip, which allows the installation of PyQt5. However, for the rest of the utility, you need to have Houdini installed as I use the hython library. Make sure to add the Houdini binaries path in your environment variables to use hython, hbatch, and husk. Without this, the commands will not work either: "path=C:\Program Files\Side Effects Software\Houdini 19.0.589\bin"
In the "Install_env_02.bat" installation script, you need to modify the paths to match your own Windows environment. Once all these steps are completed, the utility should work properly.
there is the code of Intall_env_02.bat

For the code itself, I won't go into details. Here are the modifications you can apply to make it usable in your environment :
2: Tractor Optimizations
With all of this, we couldn't just stop there. We developed tools to automate the output of our images to the dispatcher by creating scripts that allow us to analyze the logs, understand them, and relaunch automatically based on errors. This has saved us a tremendous amount of maintenance and has saved us a lot of time.
The first script aims to detect batches that are still in progress but actually stuck, unable to proceed to the next step due to various machine-related issues. The script checks the logs and identifies those that are stuck, then relaunches them.

As for the second script, its purpose is to identify all the "Done" batches, meaning those that have been completed. It locates them and also checks the logs to detect any potential errors. If everything is correct, it archives them. Otherwise, it relaunches them.

The last one allows for the automatic relaunch of batches that have been flagged with errors by the dispatcher itself.

3: CPU Limiter
CPU LIMITER is a small tool we designed to limit the impact of a batch job on your workstation.
It will automatically detect if a batch job is running on your machine, specifically the "mayabatch" and "husk" programs.
Based on your preferences, it will automatically reduce or increase the number of cores allocated to those batch job.
This application enables computations to continue running while allowing you to keep producing. Furthermore, CPU LIMITER offers functionalities such as controlling your Nimby status on Tractor and the ability to automatically remove ongoing batches on the dedicated machine (kill process), as well as any upcoming batches.
CPU LIMITER will turn off and restore the processor usage to 100% if no user activity is detected on your machine for more than 30 minutes.

IV: CONCLUSION
In conclusion, our pipeline development experience has been an exciting adventure that led us to conduct countless research and tests. We delved into various technologies, methods, and scripts, seeking a deeper understanding of software functionality and exploring previously unfamiliar domains.
Despite the challenges we encountered, we successfully established a functional pipeline by leveraging our resources and knowledge. Although it still has some flaws, it has greatly contributed to our technical learning.
This pipeline development process not only allowed us to create our graduation films but, more importantly, it provided us with a profound expertise in the field of animation filmmaking and production pipelines. We hope that sharing our experience can be beneficial to other 3D artists and technicians in their own projects, inspiring them to explore and innovate in the use of technologies like USD. We take pride in the journey we have undertaken and are excited about continuing to evolve in the world of cinema and pipelines.